TABLE OF CONTENTS
This article outlines the steps on how to merge duplicate contacts in Pooltrackr.
The Data tool is a comprehensive solution to managing duplicate contacts. You will have the option to decide which of the duplicate contacts will be set as primary. You also have the option to filter and find duplicate contacts according to specific contact information values.
Accessing the Data tools
Below are the steps to access the Data tool:
1. Navigate to My Account → Data tools.

- You will be directed to the Deduplicate contacts tab. The Contact name filter is turned on by default. However, you can select other data filters by toggling the switch beside each option.
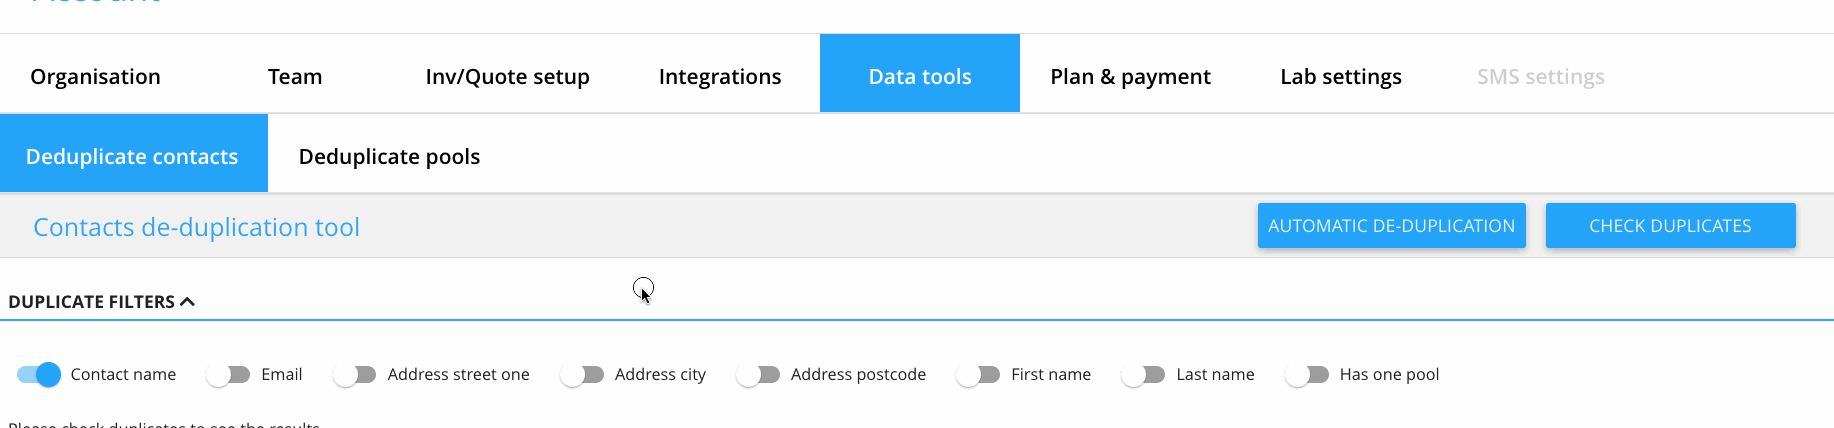
2. Once you have selected your preferred data filter, click on the Check Duplicates button.
- The duplicate contacts that match the filters you have set will appear.

Setting the primary contact
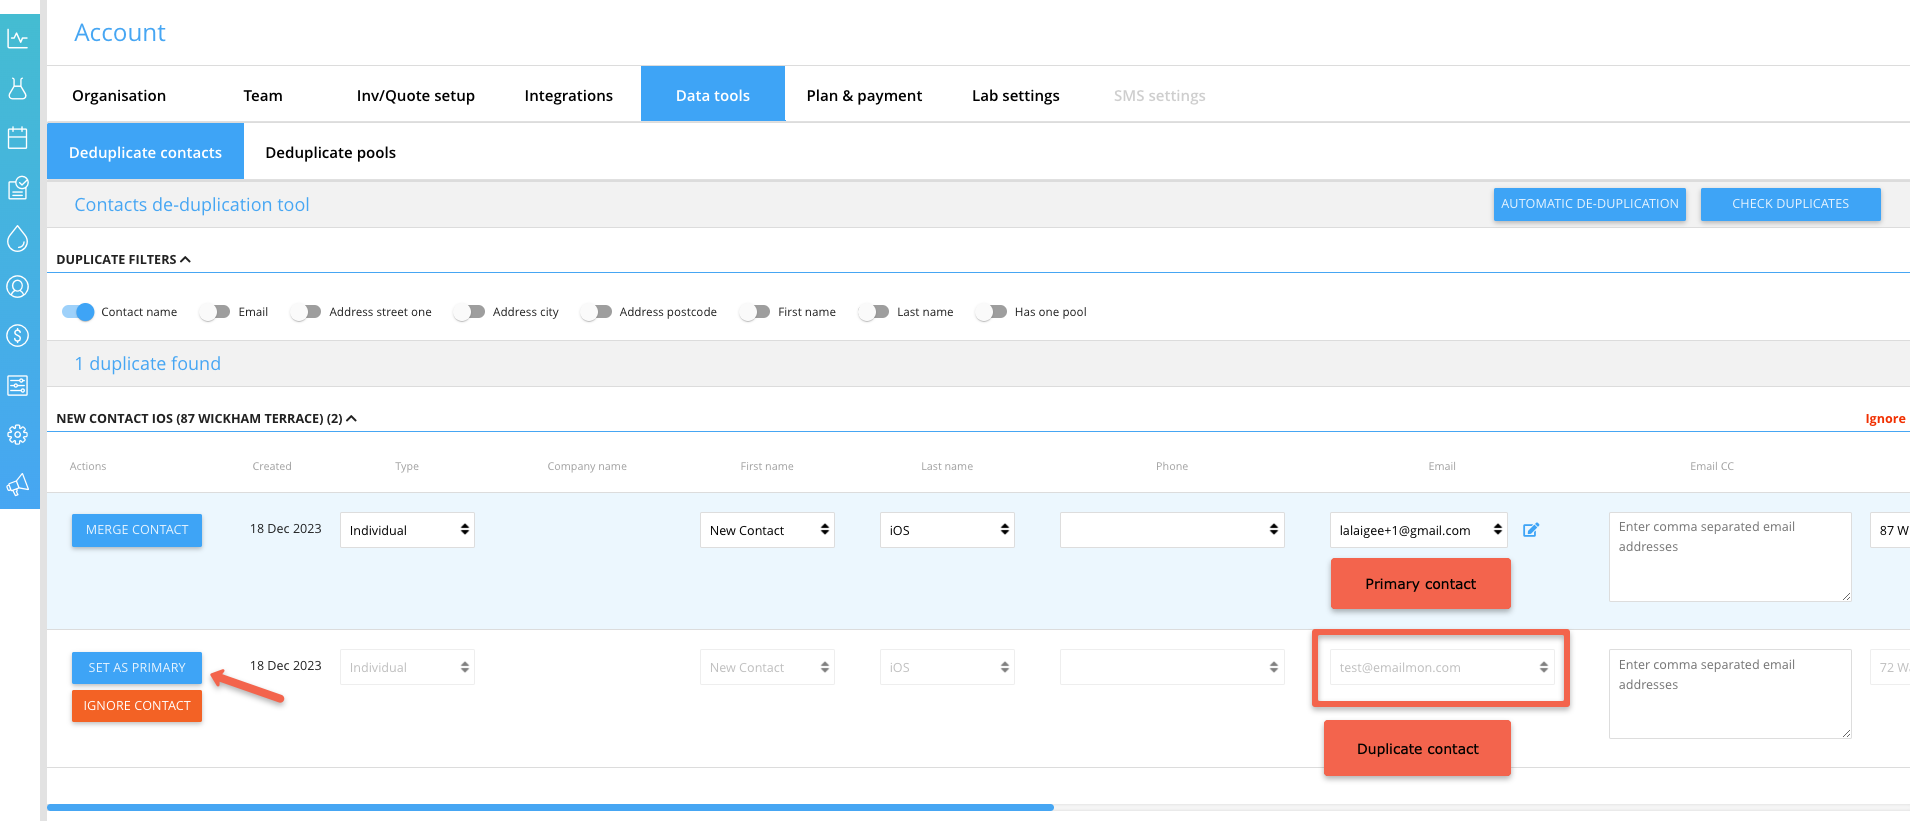
When presented with the results, you can set which of the contacts will be set as the primary and which one can be discarded. The system will choose which will be the default primary contact according to the latest contact created.
You can choose which will be the primary contact by clicking on the SET AS PRIMARY button.
Merging the Contacts
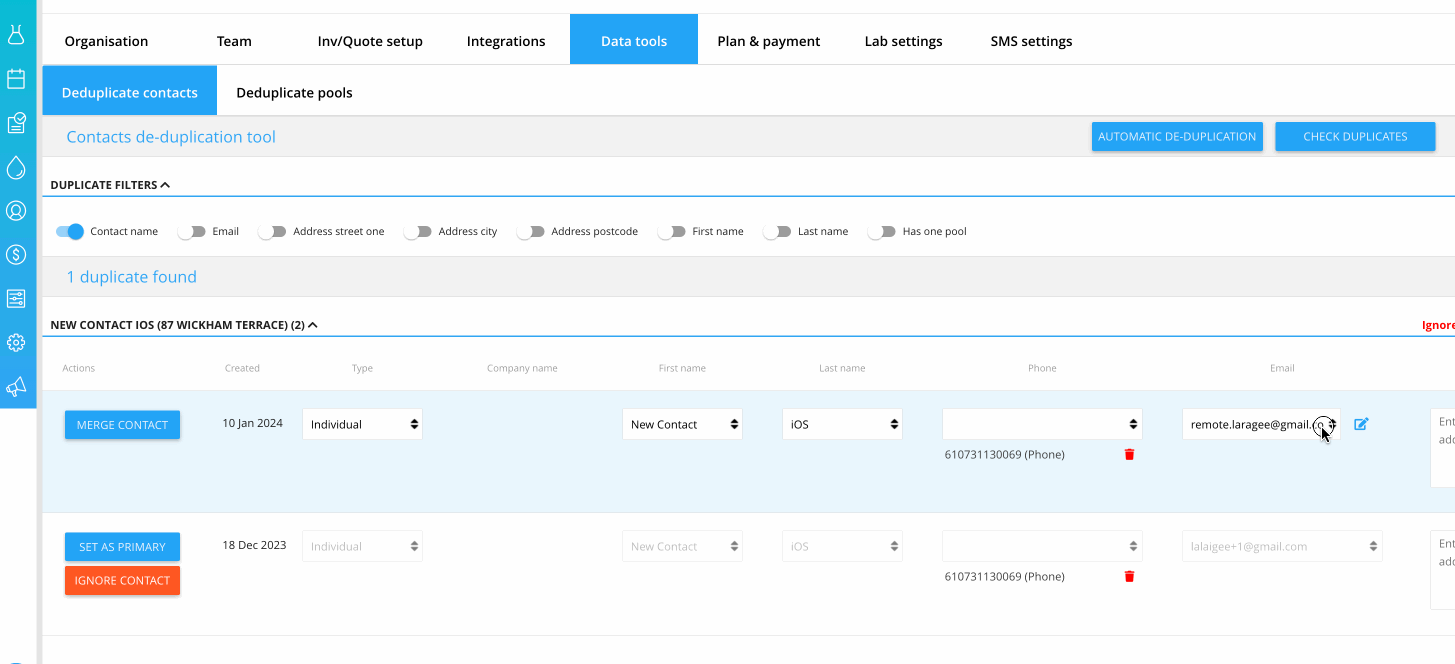
1. Once you have identified which of the contacts will be set as primary, you can select which of the available contact details to use for that primary contact by clicking on the drop-down. In this example, we got a duplicate result between New Contact iOS and New Contact iOS-iOS, we wanted to use the last name of the other contact which is just iOS. 
To do this, click on the box that contains the last name information, and select the correct detail.

This can also be applied to email addresses. The contact information of the duplicate will be added as an option for you to select and use for the primary contact.
If you are using any of the supported accounting software integration, you would need to ensure that the contact you are about to set as the primary one has the necessary contact link associated with the accounting software. The example below, demonstrates merging of contacts and syncing them to their Xero counterpart by scrolling to the right and clicking on the Xero link box. 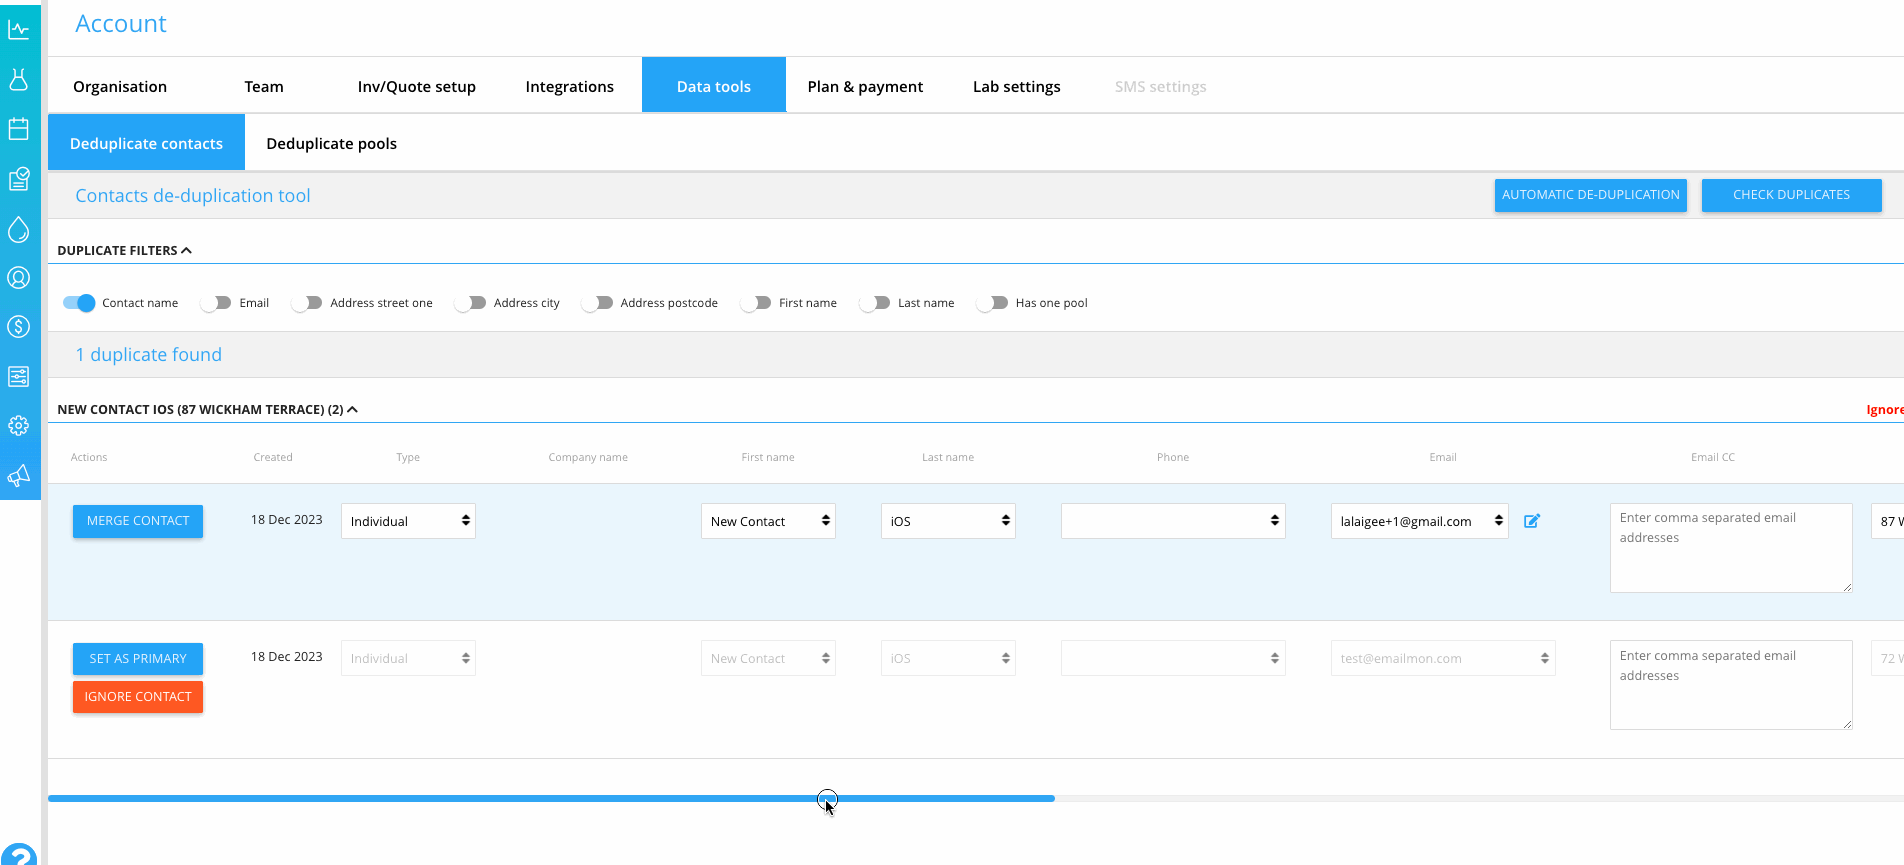
2. Once you have all the contact information set, click on the Merge Contact button to finally merge the two contacts.

- A warning message will appear. Click on Yes if you want to proceed. You will see the confirmation at the top right corner of the page.

Troubleshooting
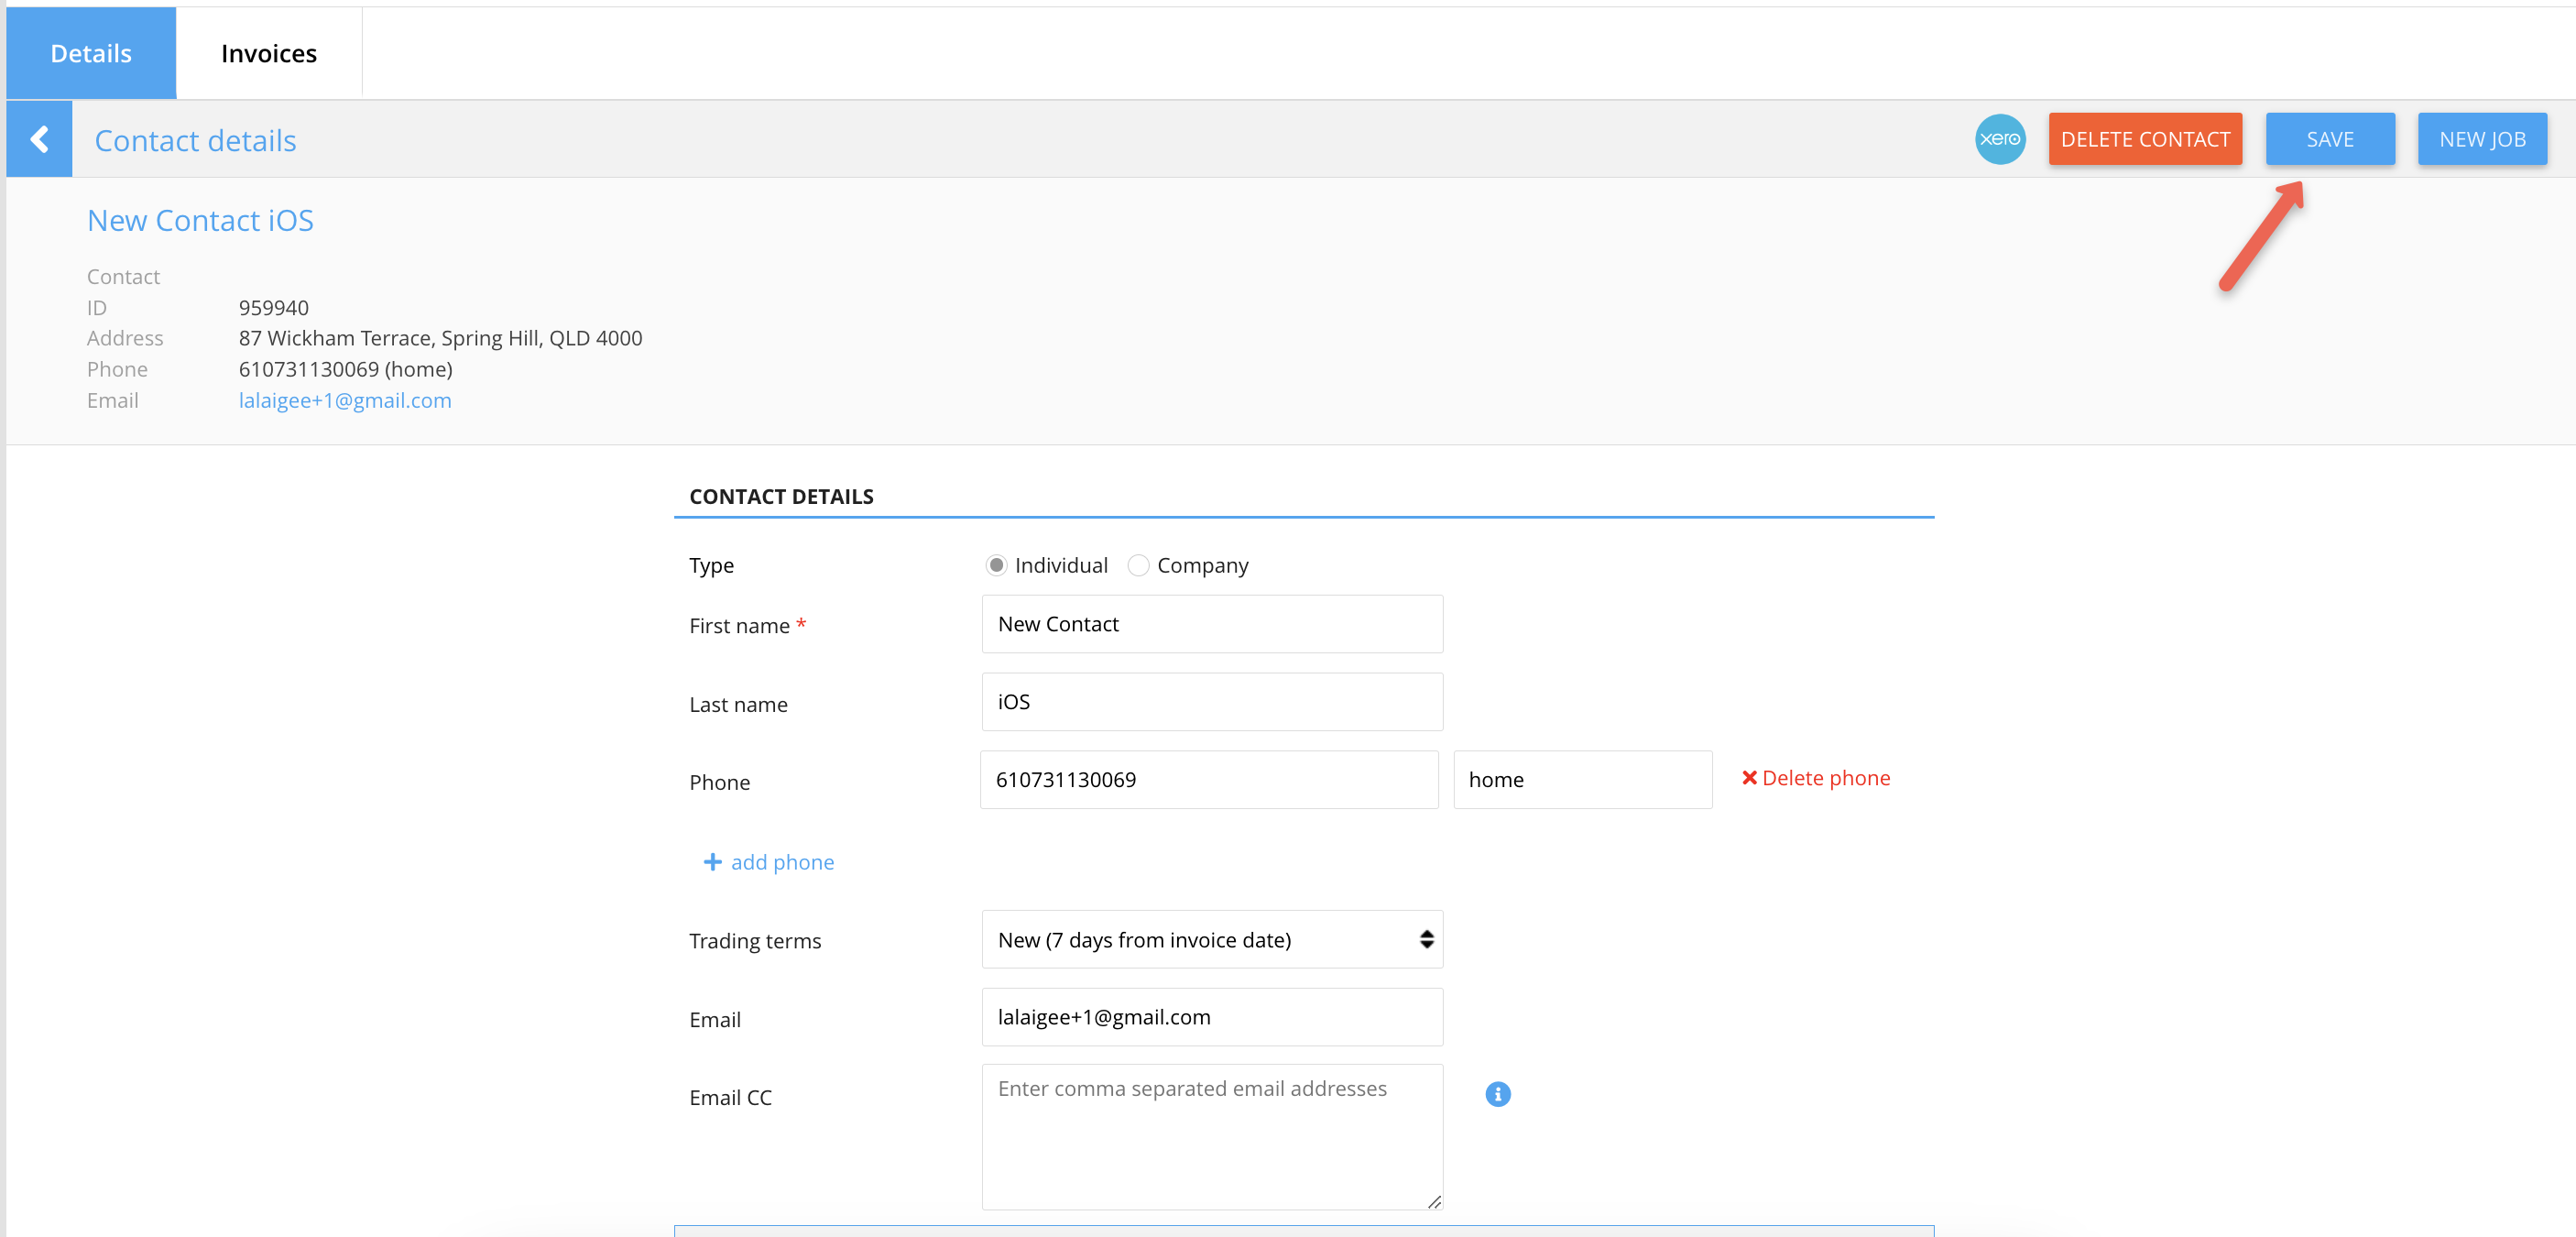
If the contact that you have merged still shows the details from the other contact (the one discarded) click on the retained contact and save it again.
Go to Contacts → click on the retained contact (the one you chose as the primary contact during deduplication) → click Save.