Description:
Your account is integrated with your Xero account and all your contacts are linked to Xero contacts.
Some rules and requirements:
We STRONGLY recommend creating contacts from the Pooltrackr side.
1. How to make sure a contact has a link to a Xero contact.
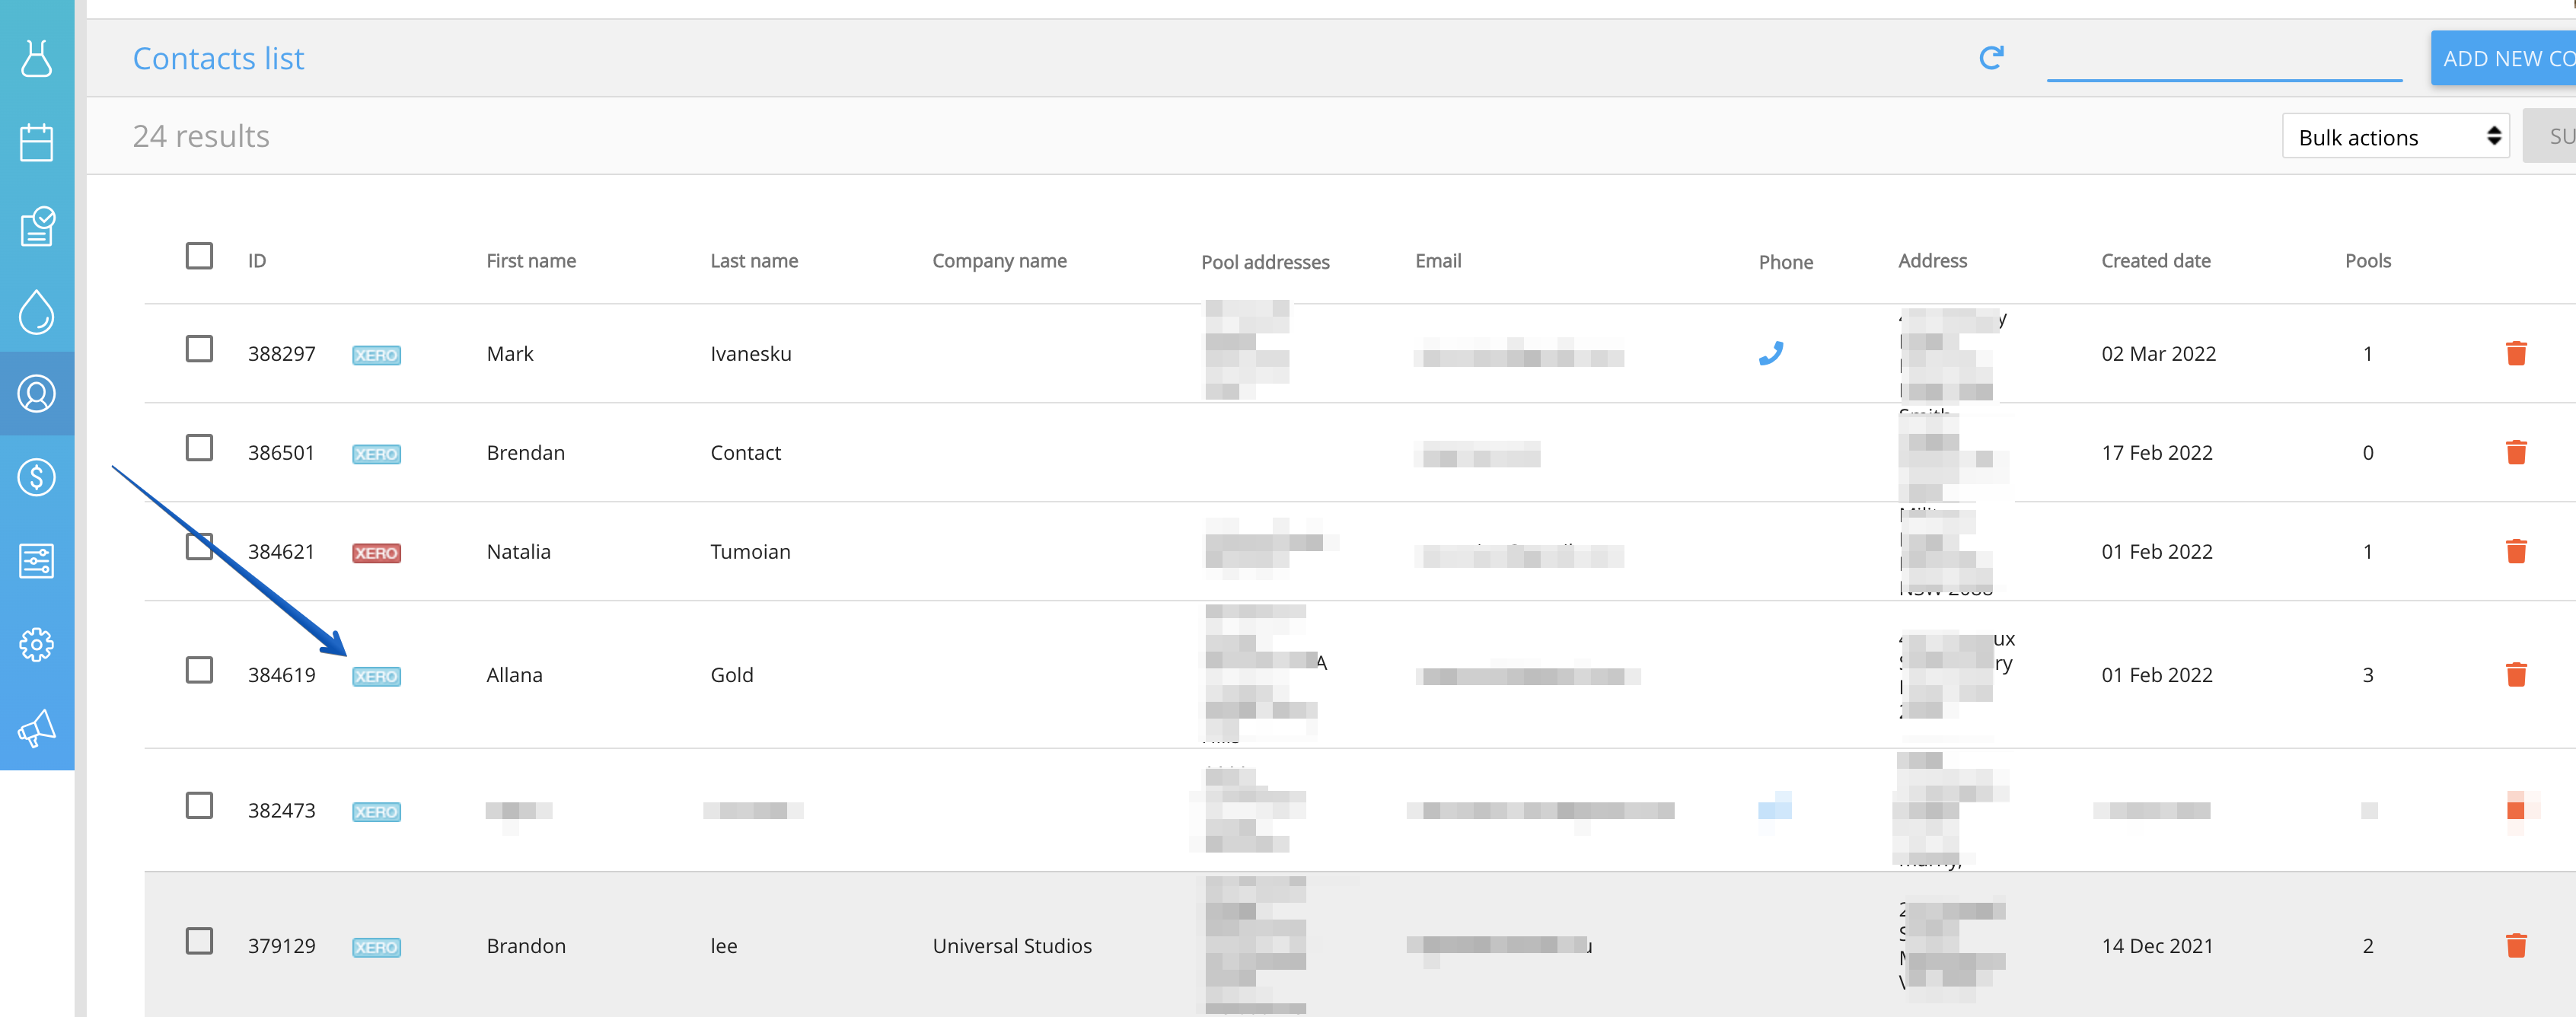
- Go to the Contacts page;
- Find the desired contact and check the Xero button it should have a Blue colour.
2. When you create a new contact in Pooltrackr, a new Xero contact immediately appears in Xero.
Exception:
If you create a new contact in Pooltrackr and it has a red Xero button and you can't find a Xero contact to link them.
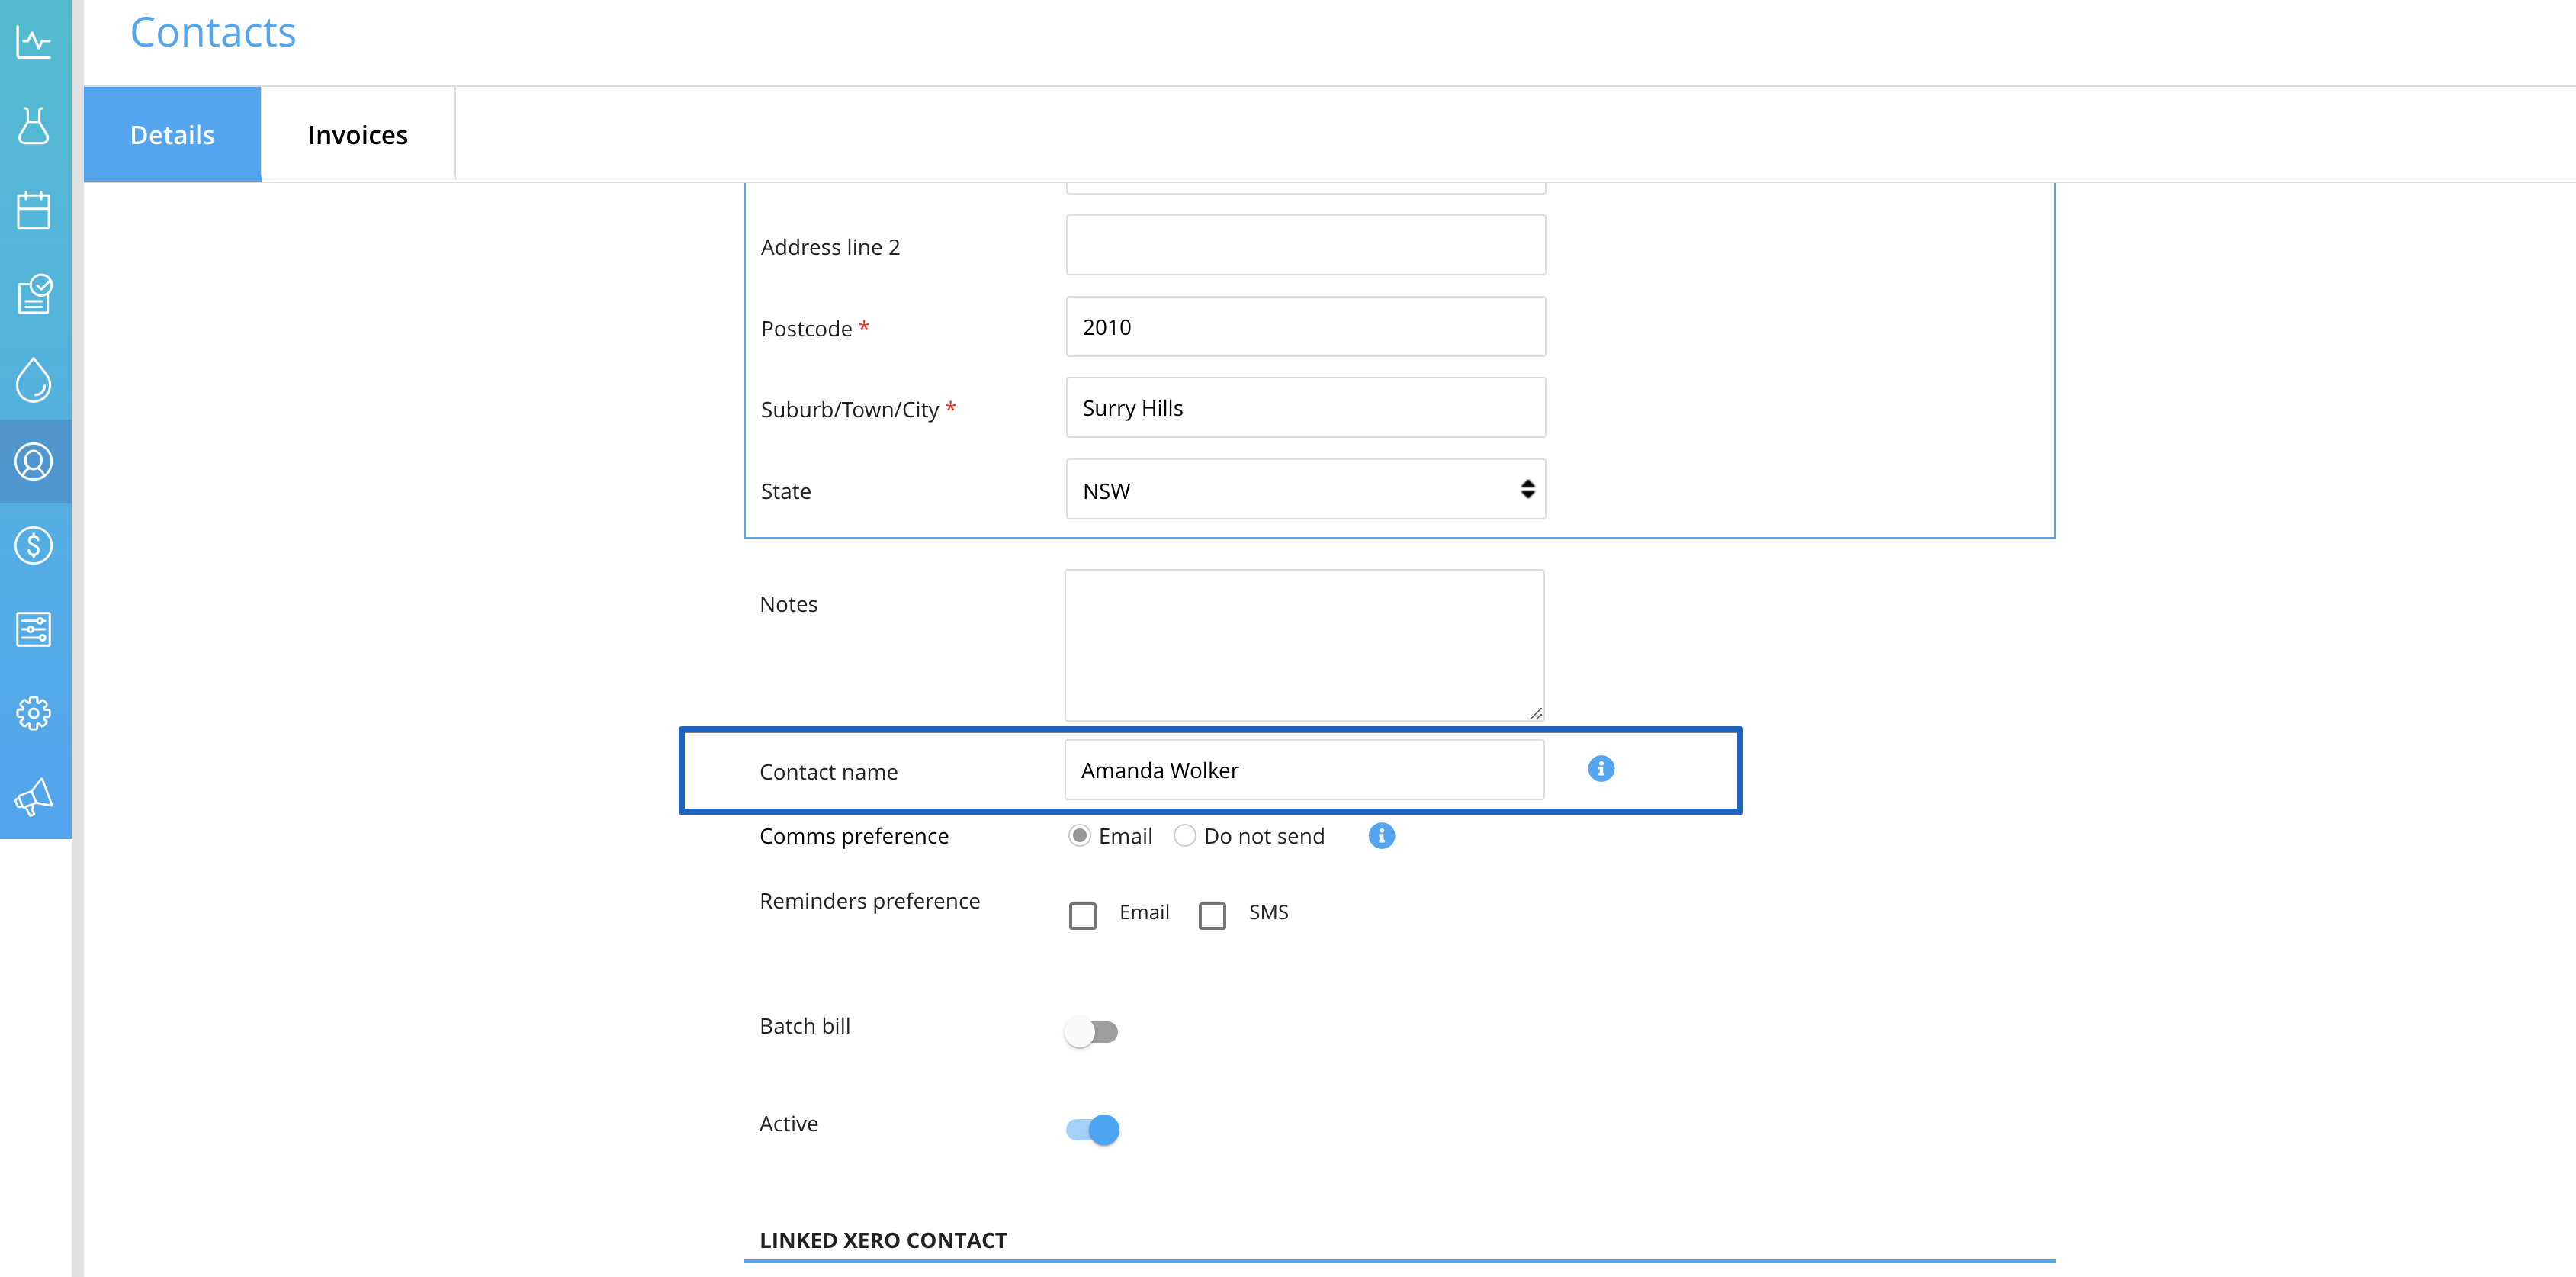
- Go to your Xero account and try to find the same contact there it can be in the 'Archived' list or 'non Customer' (to find a 'non Customer' you can in the 'All contacts' list in Xero). Please, search contact by a 'Contact name'
a) If you find your contact in the 'Archived' list, unarchive it and get back to Pooltrackr to link the Pooltrackr contact with the Xero one.
b) If you find your contact as 'non-customer' (it appears in the 'All contacts' list but it's absent in the 'Customer' list), send a draft invoice for this contact from Xero. Sending the invoice makes contacts 'Customers'.
Please, DO NOT create a new contact in Xero if you can't unarchive a contact or can't find it in the 'All customer' list just notify the Pooltrackr team about this case.
3. You have a contact that is already linked to a Xero contact. You need to change the contact address and link a new pool to the contact.
a) Open your Pooltrackr account and go to the Contacts list;
Find the desired contact and go to the Contact details page;
Change the contact address and save changes - the contact address is updated for the Xero contact too.
b) Go to the Pools list page and click the 'Create a new pool' button;
Creat the pool with for the new address
c) If you have future jobs assigned to the pool with the old address and they are not actual, delete them
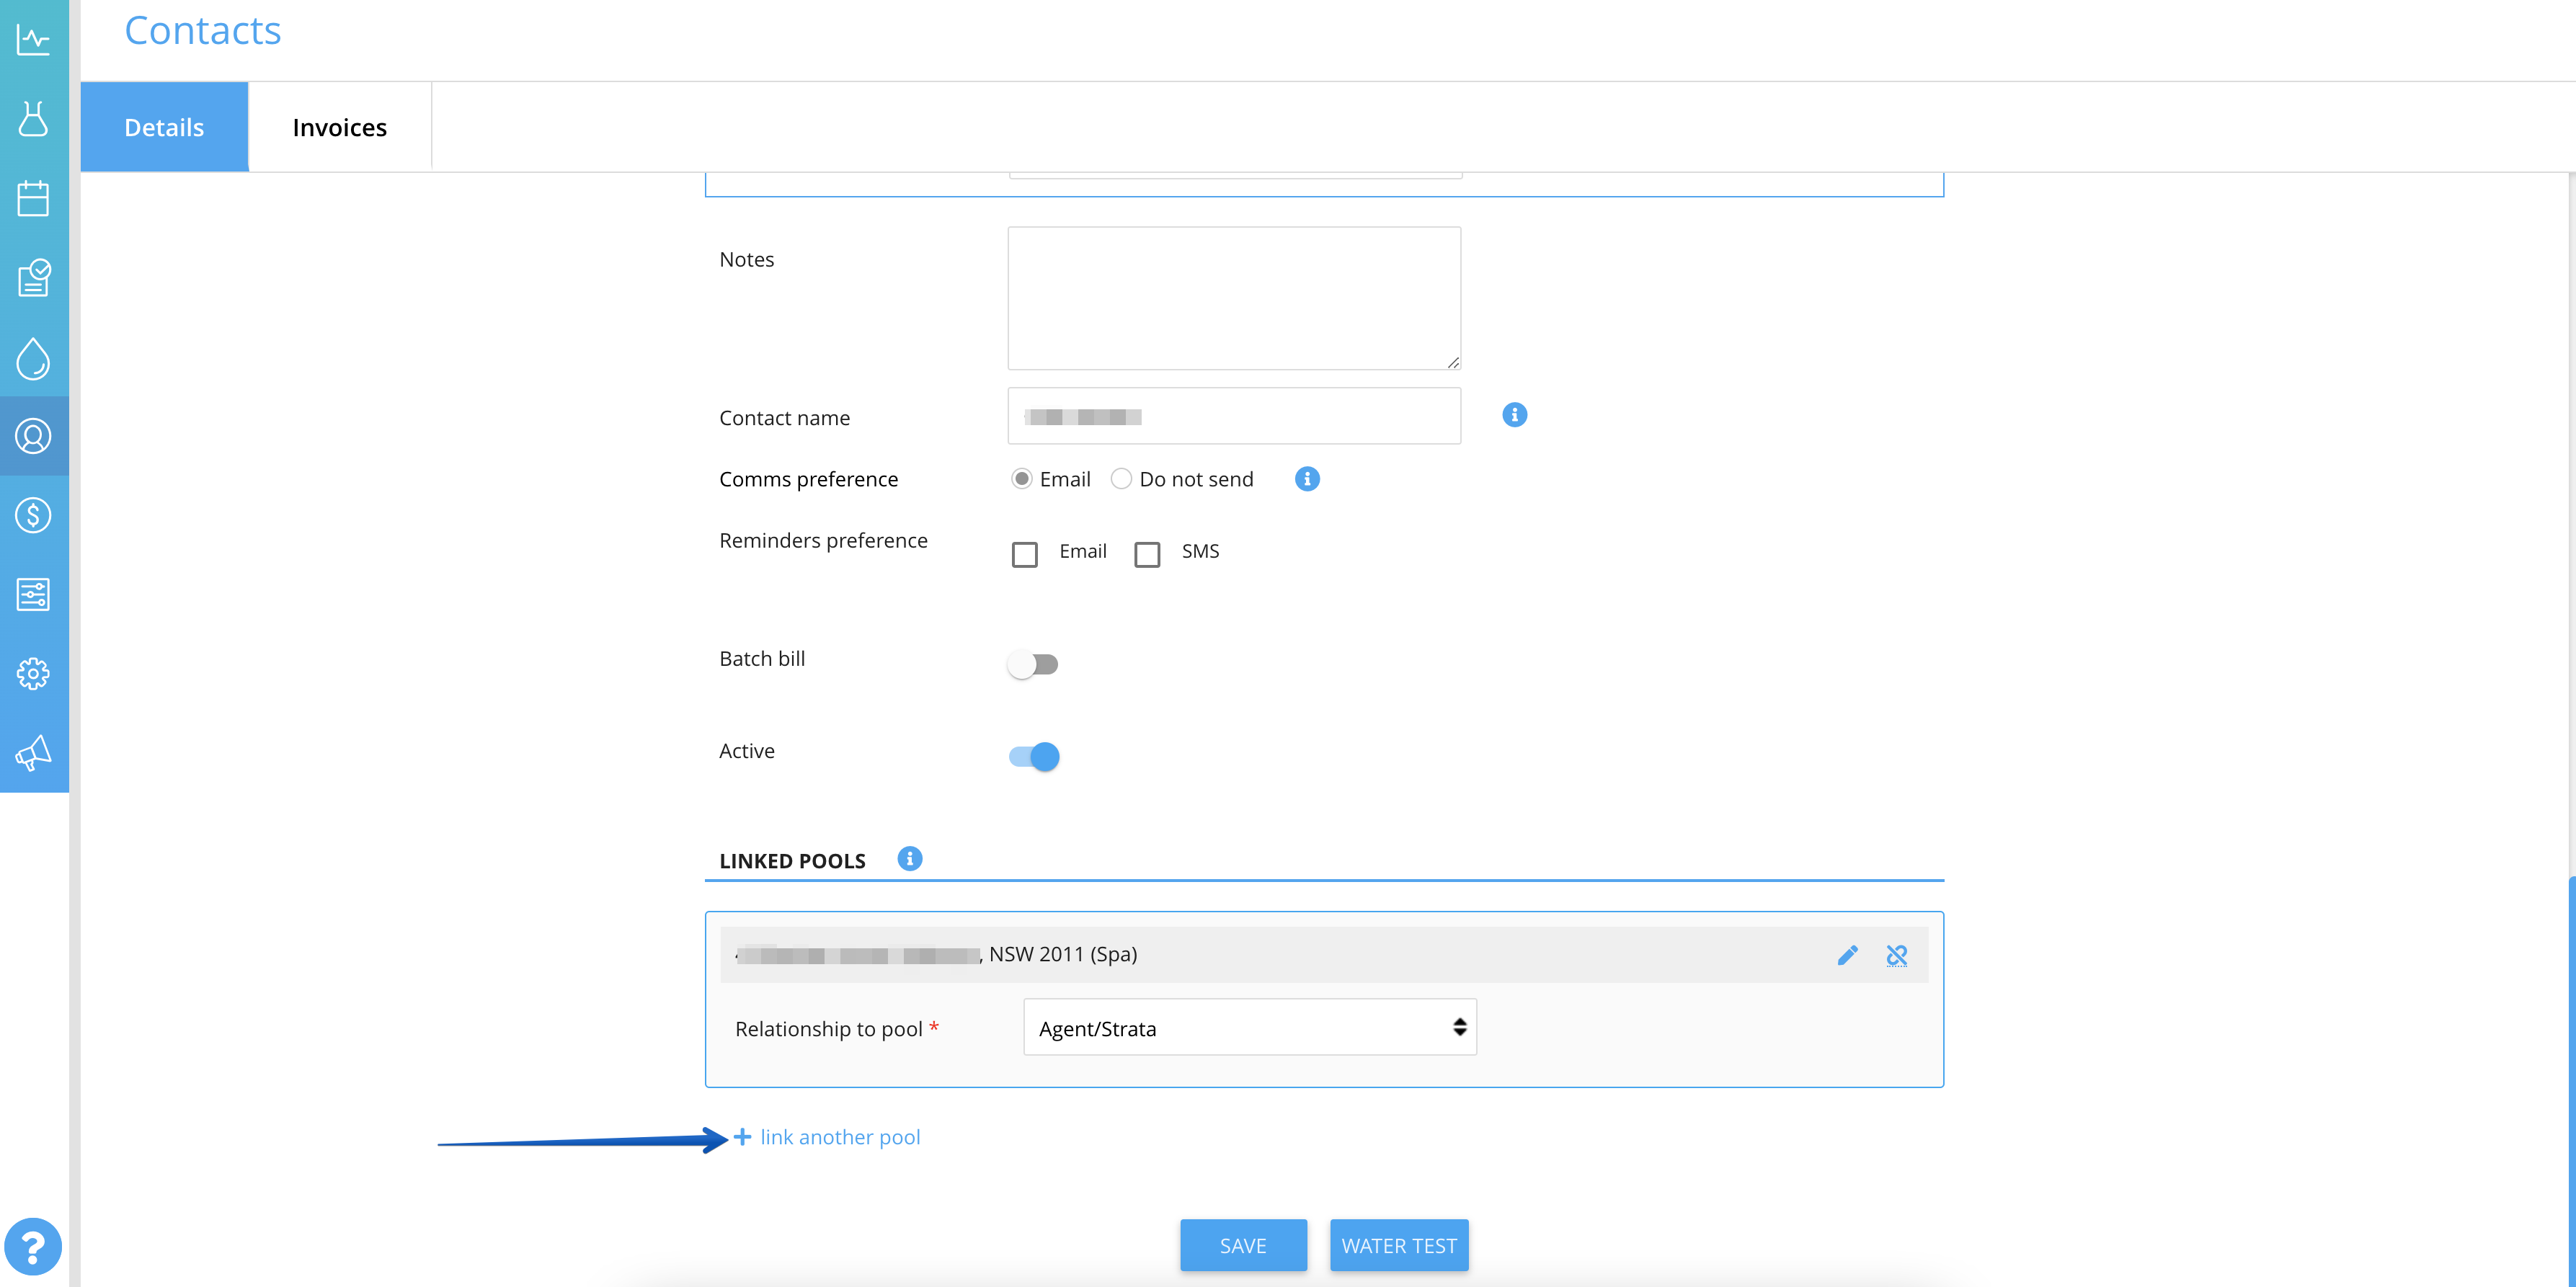
d) Get back to the Contact details screen and link a new pool to the contact and click the 'Save button'
e) Find the pool with the old address in the Pool list and make it inactive

As a result:
- You have the contact with the new address;
- Your Xero contact is updated and has a new address too;
- The contact has 2 linked pools (1 pool with the old address and another one with the new address);
- If you are going to create a new job for this contact, only the pool with the new address will be available in the Pool list.